05.Python Flask Mysql 연동 하기

Written by niee on
이번에는 scheduler 데이터 관리를 위해 mysql을 연동해서
간단히 select 및 insert 하는 틀을 잡아보겠다.
mysql 설치 및 databse / table 생성
- mysql을 설치한다.(요건 알아서…)
- database를 생성한다.
- table을 생성한다.
- 테스트용 데이터를 하나 집어넣어 준다.
/*database 이름은 각자 편하게*/
create database myintranet;

/*테이블 생성*/
CREATE TABLE `my_schedule` (
  `id` int(11) NOT NULL AUTO_INCREMENT,
  `title` varchar(255) NOT NULL,
  `start` datetime NOT NULL,
  `end` datetime NOT NULL,
  `allDay` char(1) NOT NULL DEFAULT 'Y',
  PRIMARY KEY (`id`)
);

insert into my_schedule(title, start, end, allDay) values('my schedule', now(), now(), 'Y');

commit;
mysql python용 드라이버 설치(pymysql 사용)
- virtualenv activate
- pymysql설치
- pymysql설치 이유는 select된 데이터를 바로 Dictoionary형태로 넘겨주는 기능이 있어서.(라고쓰고 설치할때 에러가 안나서….) 다른데도 있는진 모르겠음
# virtualenv는 설치된 상태라 가정

$> . schedulerenv/bin/activate
(schedulerenv) $> pip install pymysql
schedule data를 처리할 dao/schedulerdao.py 작성
- dao폴더에
__init__.py생성 - db connetion을 담당할
getConnection()함수 생성 - schedule을 가져올
getScheduler()함수 생성 - schedule을 입력할
setScheduler()함수 생성 - python package 참조
- 완성된
schedulerdao.py소스확인
# -- coding: utf-8 --
#처리된 데이터를 json형식으로 리턴해주기위해 사용
import json
#python mysql 연결 드라이버
import pymysql

#db연결을 담당할 함스
def getConnection():
    return pymysql.connect(host='localhost', user='root', password='123456',
                           db='myintranet', charset='utf8')

#select한 데이터중 mysql datetime형식의 값을 fullCalendar에서 처리할수 있도록 포멧 변경
def date_handler(obj):
    return obj.isoformat() if hasattr(obj, 'isoformat') else obj

#등록된 schedule을 가져옴
def getScheduler(searchDate):
    # Connection 연결
    conn = getConnection()

    # select한 데이터를 Dictoionary 형태로 가져옴
    curs = conn.cursor(pymysql.cursors.DictCursor)

    # SQL 처리
    sql = "select id, title, start, end, if(allDay = %s,true,false) allDay from my_schedule where to_days(start) >= to_days(%s) and to_days(end) <= to_days(%s)"
    curs.execute(sql, ('Y', searchDate['start'], searchDate['end']))

    # 처리된 data 가져옴
    rows = curs.fetchall()

    # Connection 닫기
    conn.close()

    #처리된 데이터를 json으로 변경 datetime처리를 위해 date_handler지정
    return json.dumps(rows, default=date_handler);

#넘어온 schedule을 등록
def setScheduler(schedule):
    # connetion 가져옴
    conn = getConnection()
    # cursor 생성
    cur = conn.cursor()
    # 데이터 입력
    ok = cur.execute("INSERT INTO my_schedule(title, start, end, allDay) VALUES (%s, now(), now(), 'Y')",(schedule['title']))
    # commit
    conn.commit()
    # Connection 닫기
    conn.close()
    # 처리 결과를 json형식으로 리턴
    return json.dumps({'rows' : ok})
클라이언트와 통신할 schedule route생성
application.py에 신규scheduler route추가schedulerdao importget method접속은 schedule을 가져옴post method접속은 schedule을 입력함- 넘어온
form/queryString parameter는request.args.get('paramname')형식으로 받아옴 - 수정된
application.py소스확인
--------생략-------

# schedulerdao import
from dao import schedulerdao

--------생략-------

# schedule 처리 get/post로 접근가능
@app.route("/scheduler",methods=["GET","POST"])
def scheduler():
    # 요청이 get이면
    if request.method == 'GET':
        # fullCalendar에서 start와 end를 yyyy-mm-dd 형식의 parameter로 넘겨준다.
        start = request.args.get('start')
        end = request.args.get('end')
        # schedulerdao.getScheduler에 start와 end를 Dictoionary형식으로 넘겨준다.
        return schedulerdao.getScheduler({'start':start , 'end' : end})

    #요청이 post면
    if request.method == 'POST':
        # Dictoionary 형식의 schedule 변수를 만든다. 추후 parameter를 받게 수정예정
        schedule = {'title' : 'test', 'contents' : 'contents'}
        # schedule을 입력한다.
        return  schedulerdao.setScheduler(schedule)

--------생략-------
fullCalendar 에 events 추가
----생략----
<script>
$(document).ready(function() {
  $("#calendar").fullCalendar({
    events : '{{url_for('scheduler')}}'
  })

  $('#insertBtn').click(function(){
    $.ajax({
      url : '{{url_for('scheduler')}}',
      type : 'post',
      success : function(res){
        let data = JSON.parse(res);
        if(data.rows > 0){
          //데이터가 입력되면 이벤트를 다시 가져옴
          $("#calendar").fullCalendar( 'refetchEvents' )
        }
        else{
          alert('실패');
        }
      }
    });
  });
});
</script>
----생략----
<button type="button" id="insertBtn">스케줄 등록</button>
<div id="calendar"></div>
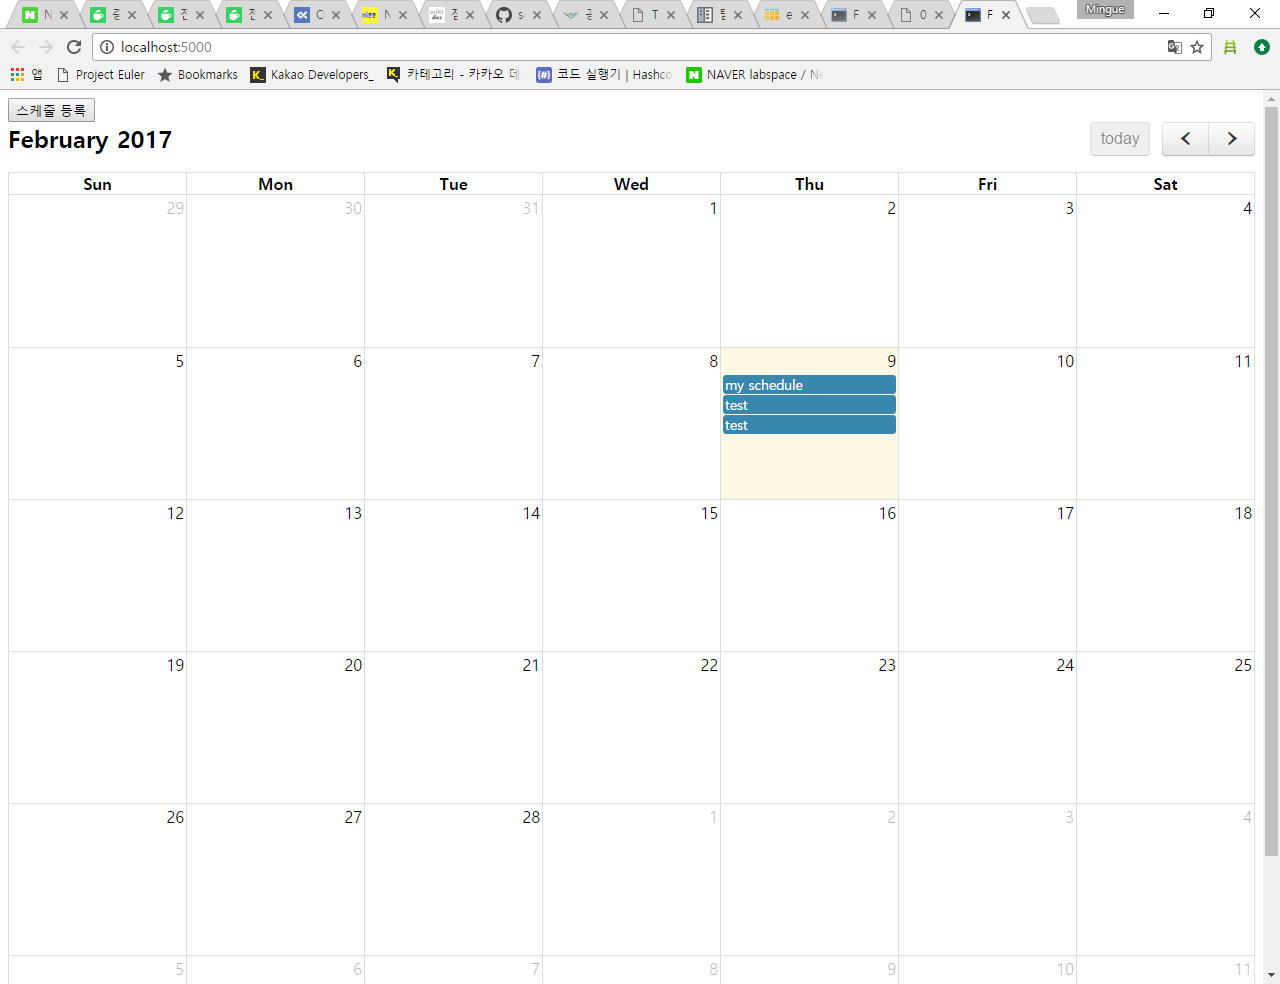
실행 및 접속 확인
(schedulerenv) $> python application.py

http://localhost:5000
- 이 포스트는 http://flask-docs-kr.readthedocs.io/ko/latest/index.html 를 참고하여 만들었습니다.
Explore more like this
07.Python Flask mysql 데이터 수정 & scheduler 마무리
이번에는 등록된 schedule 수정기능 추가하고 파라메터에 빈값이 들어오나 체크하는 부분을 공통 함수로 빼고 기타등등잡다한 부분을 마무리 하고 fullcalendar를 이용한 scheduler를 끝내겠다.
06.Python Flask mysql 데이터 입력, 삭제
이번에는 지난번에 대충 만들어둔 schedule입력을 완성하고 삭제추가 및 schedulerdao.py의 중복이 일어나는 부분을 리팩토링 해보겠다. 원래 리팩토링 이런거 안하는 사람이니 감수하고 봐주시길...
Comments